Make use of the versatile reporting options available for link fields.

Link fields allow you to cross-reference records. For example, in a system where customers are reporting product issues, you may have a form for tracking information about each customer (products they purchased, contact information, support contract dates, etc.) in addition to the issue/ticket form they use to report issues. Below you can see a ticket, which includes a list of customers who reported the same issue. There are different options for running reports with these links.
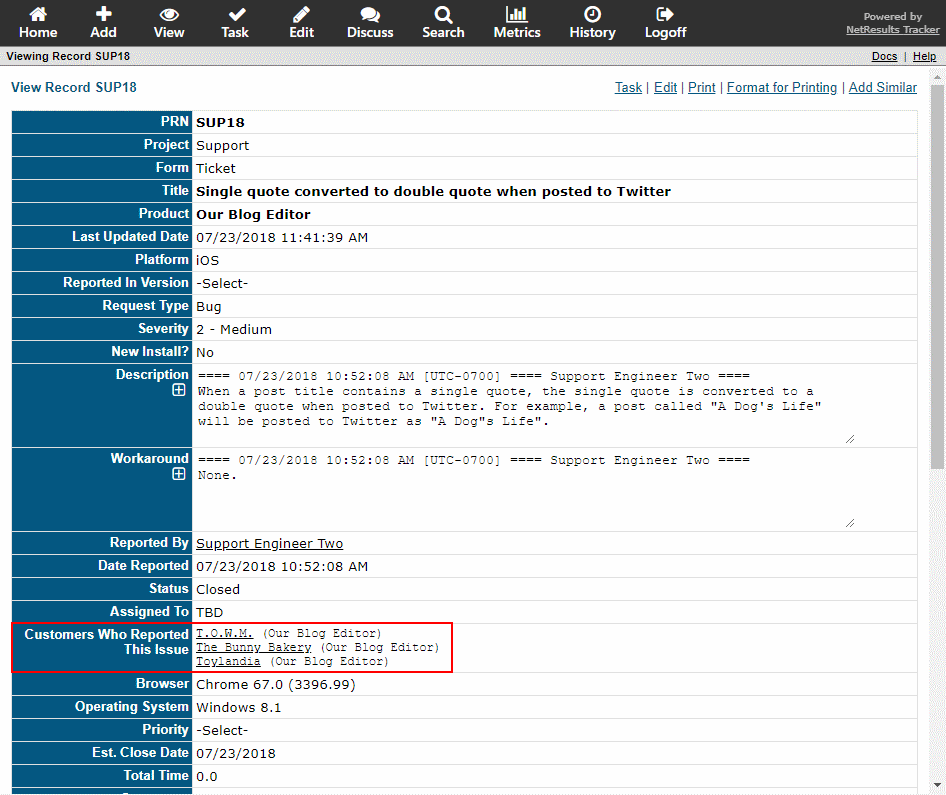
Customers Who Reported This Issue

Key Word Search

Use the "contains" option to search for tickets where the linked record includes the key word in its key fields.
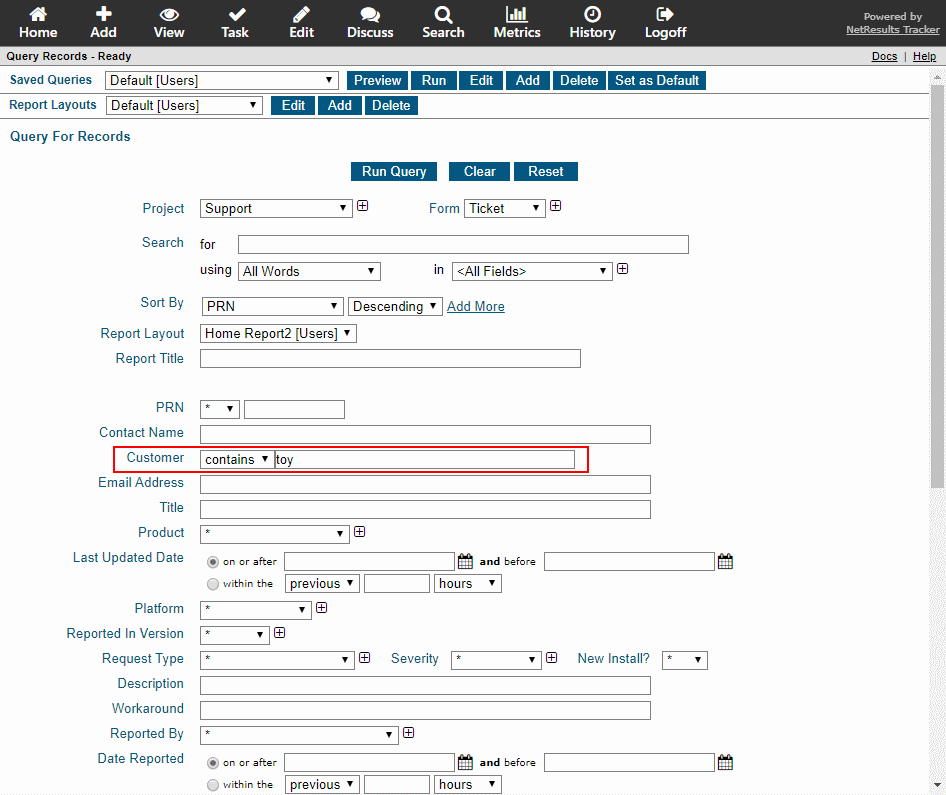
Key Word Search in a Link

The key fields of the linked record are the fields displayed in the link; "Company Name (Product)" in the example below.
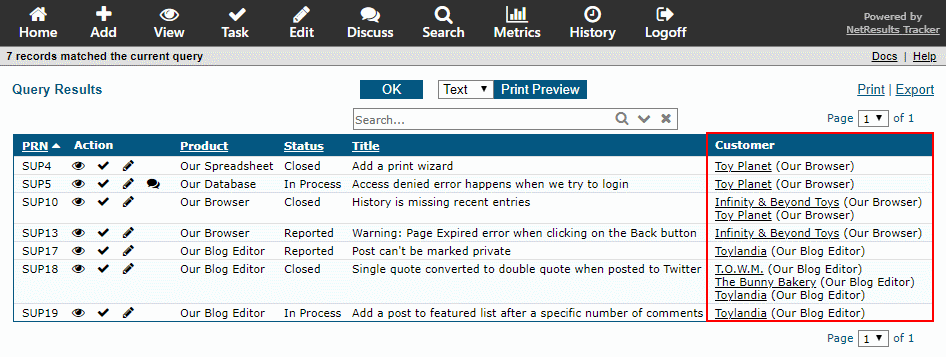
Key Word Search Results

Specific Links

Find tickets linked to one or more specific customers using the "is one of" option.
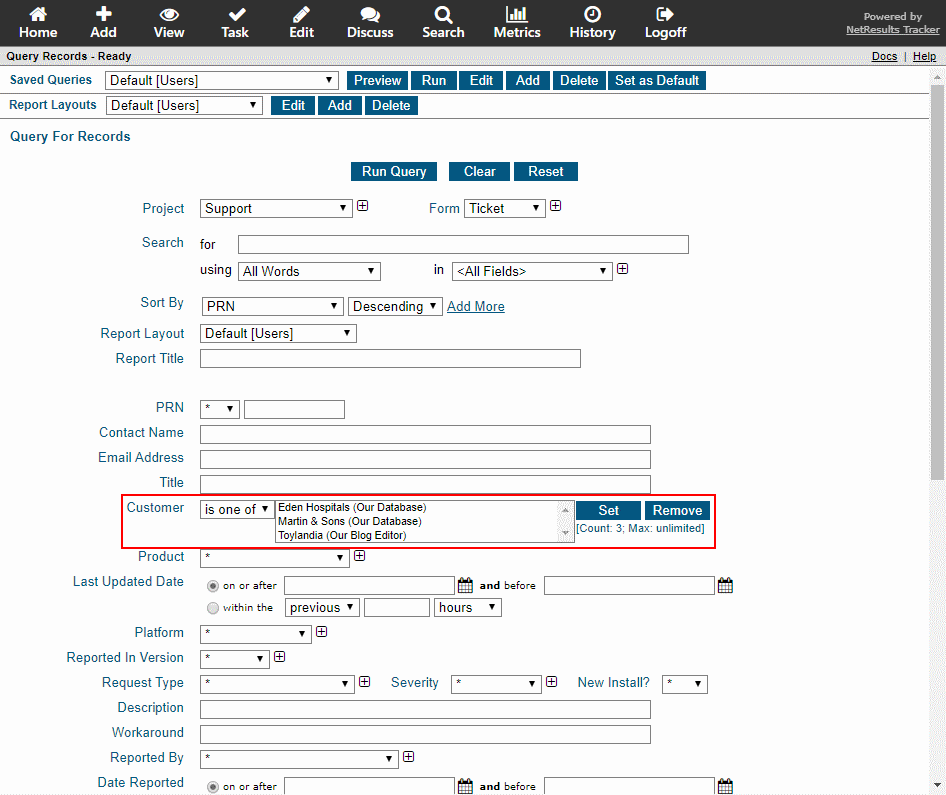
Find Specific Links

Match to the Results of a Query

Locate tickets linked to the results of a saved query. For instance, find all tickets reported by Western Region Customers.
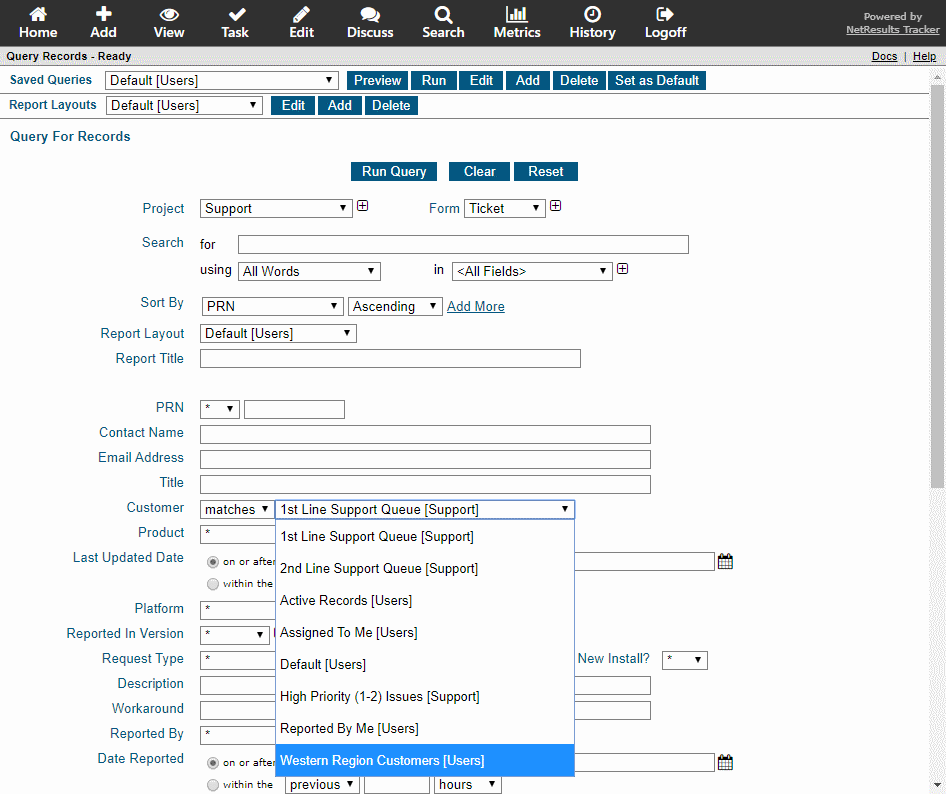
Match a Saved Query

More information can be found in the Querying Records section of the User Help Guide.

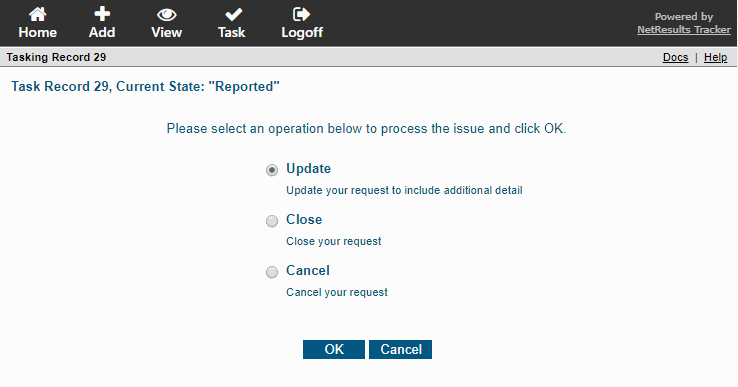
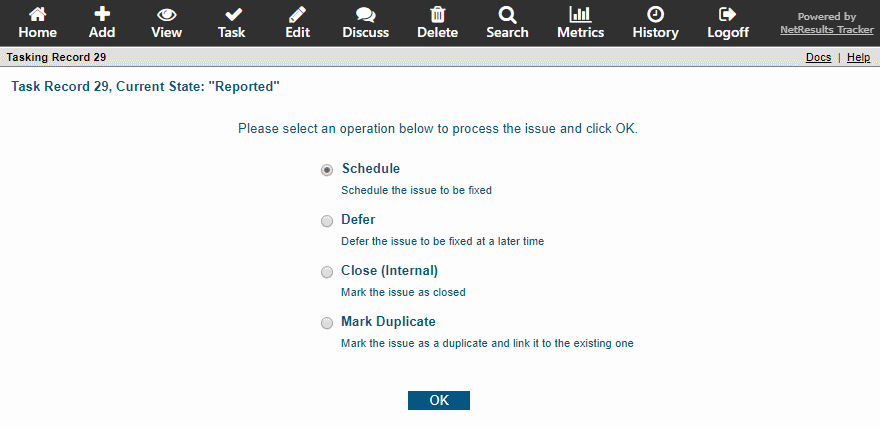
Show a different set of transitions in a step depending on who is processing the record.

Options for Reporter

The list above shows the options available for the reporter in a product development process. The image below shows what the process manager sees when processing the same record.

Internal Options

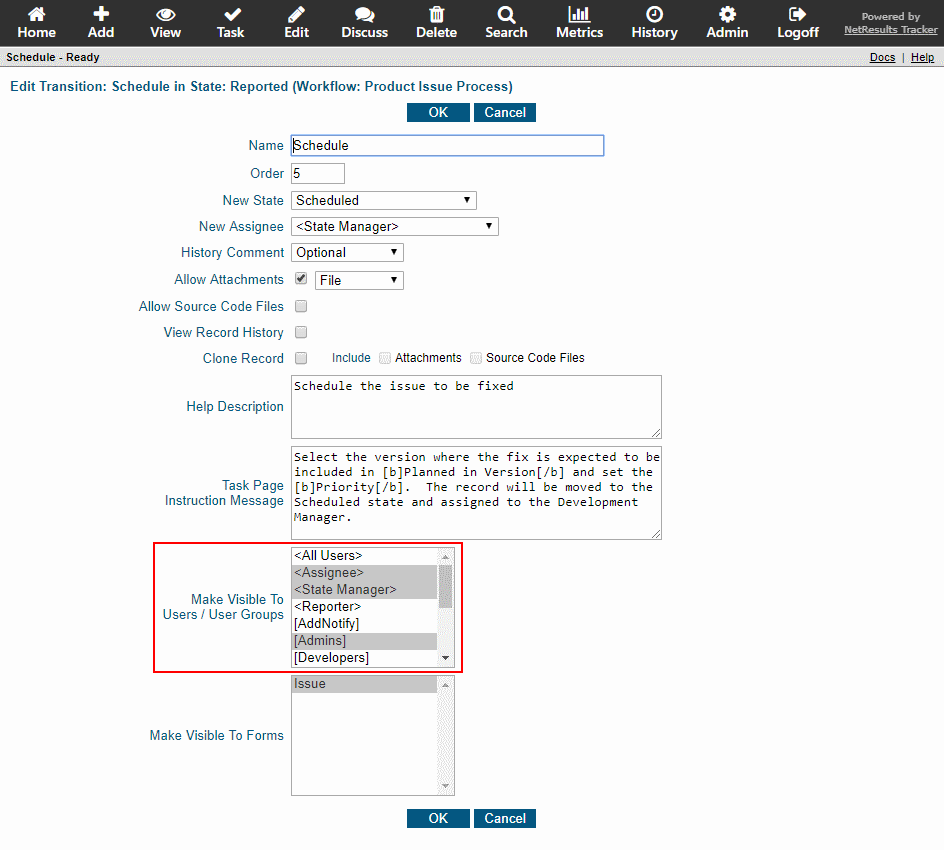
This is configured using Transition Visibility. This can be set in the Make Visible to Users / User Groups option available for each transition.

Transition Options

To configure this option in an existing transition:

  1. Login as Admin and click on the Admin icon.
  2. Click on the Workflows link.
  3. Select the workflow in the pulldown at the top.
  4. Click on the Manage link to the right of States.
  5. Click on the state that contains the transition you wish to modify, then click on the Transitions button.
  6. Click Edit to the left of the transition you wish to modify.
  7. Make selections in the Make Visible to Users / User Groups option, then click OK to save the changes.
  8. Since transitions are configured with "<All Users>" selected by default, you'll need to repeat steps 6 and 7 for each transition available in that state.

For more information, please review the Transition Properties section of the Online Help Guide.

Alerts can be sent and repeated in 15 minute increments.

If you're using Alerts to regulate response times, you can trigger notifications in 15, 30 or 45 minute increments in Version 7.0 or newer.

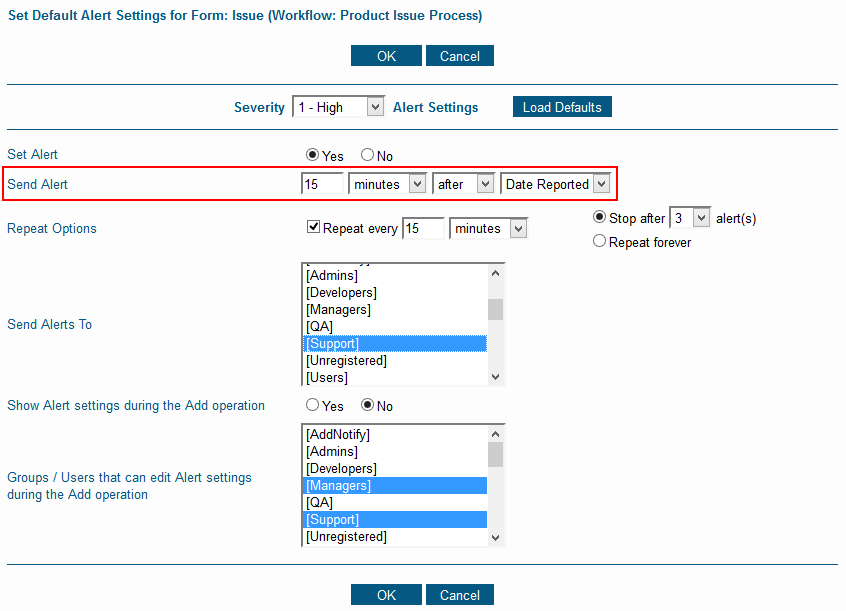
Severity 1 Issues

You can set Alerts such that when a severity 1 issue is reported, it can trigger an alert every 15 minutes until someone takes action on the issue.

Severity 1 Example

To configure alerts this way, check out the based-on alerts blog post for details.

Information about upgrading to Version 7.0 or newer can be found on the downloads page.

Start off with a template that has a form, fields and workflow modeled for your intended use already set up.

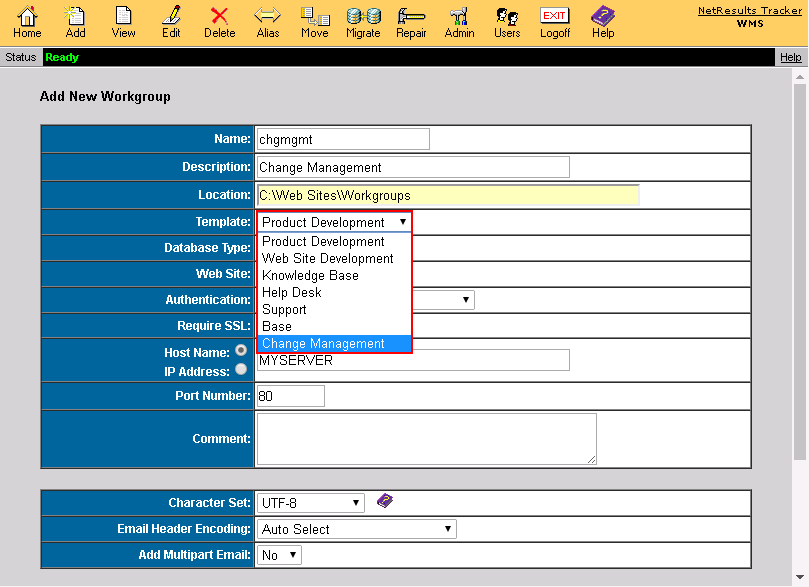
When you create a new workgroup, you can select from different templates for popular uses of Tracker such as Product Development, Support or Change Management. If none of the templates matches the process you are implementing, there is a Base template with a minimal configuration so that you can add your own fields workflow.

Choose a Template

Learn about the configuration of a template by clicking on a template's link in the Online Help Guide.

This blog post provides helpful information for implementing a new process or project.

Following up on an earlier post with more best known methods for delivering extraordinary support via Tracker.

Choose an Assignment Option

Flexibility is one of the biggest strengths of Tracker's workflow engine. Here are a few of the many ways to assign tickets. Click on the link to see details for setting up the option:

The Workflows section of the Getting Started Guide discusses other options. You can also contact Technical Support if you need help configuring your workflow.

Capture Data for Metrics

Build in fields that will collect data you can analyze via the Metrics feature:

  • Add a "Fixed By" field to save which engineer resolved each issue to run performance reports. This blog post explains how to set up a User Pulldown.
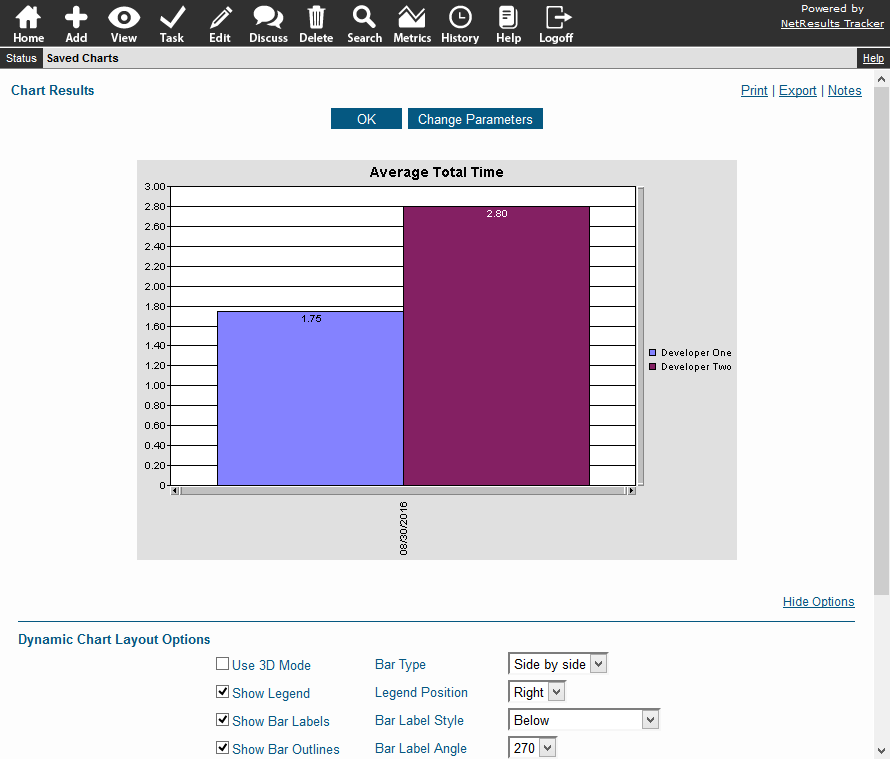
  • Use a Time Spent field to track how much time was spent on each ticket.

Average Time Spent Chart

Open Up Lines of Communication

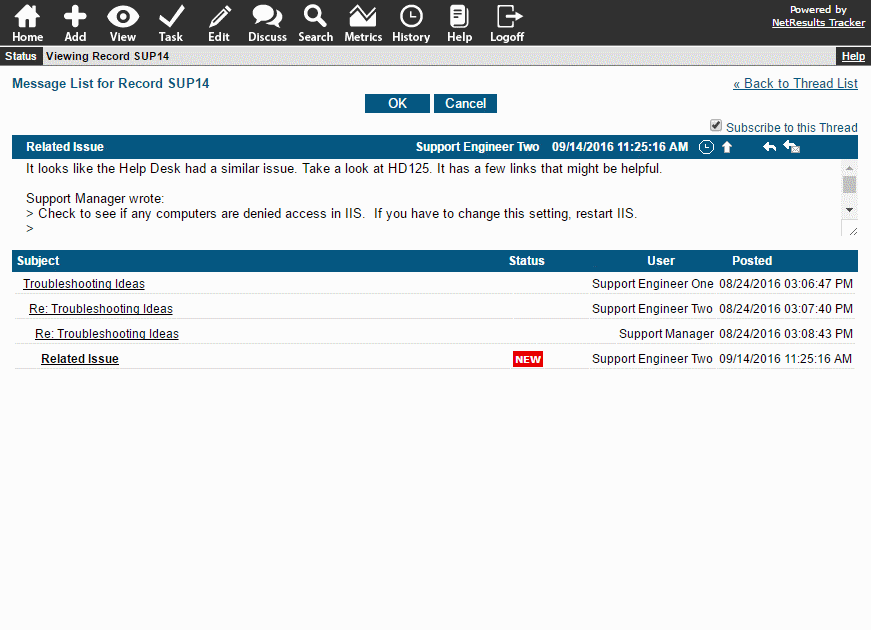
Use the Discussion feature to allow engineers to have a conversation about a ticket for faster troubleshooting and sharing of best practices. Customers can also use this feature as a quick means of providing additional information needed to resolve an issue.

Discussion Thread

For more information, check out the Discussion section of the Online Help Guide.